Expert guidance to start suburban ranching for fresh eggs & feathered companionship.
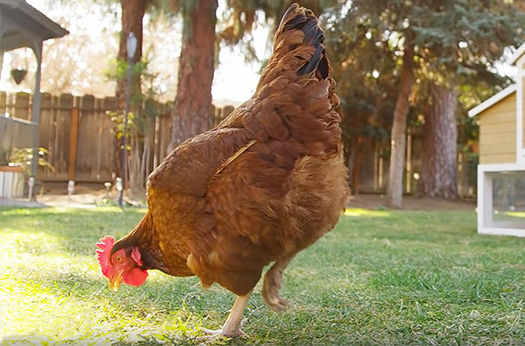
How to Raise Baby Chicks

Chickens are relatively easy animals to raise, whether you have a small farm or just plan on raising your own fresh eggs. While adult chickens are easy birds to keep, baby chicks can be a little more high maintenance with a higher mortality rate while they’re still growing. Having proper caregiving practices is also important to support your baby chicks before they mature into adult chickens. Following some simple steps will keep your babies healthy until they become viable and thriving adult chickens.
Where to Get Chicks

Sourcing your babies properly is important to be sure you get what you want and that they grow into healthy birds. Chicks can be bought locally in the spring from farms, farm supply stores, or even from mail-order catalogs that supply farms. Before you bring your baby chicks home, you need to set up the proper environment. Baby chicks have different needs than adult chickens, so keep this in mind when prepping.
Set Up Chick Feeders

Chick feeders will be different than adult chicken feeders. Adult feeders are bigger while chick feeders are smaller and designed to better accommodate the size and needs of the small chicks to make sure they can’t easily stomp through and defecate in their food. Chicks make a mess when they eat. While this is cute for a little while, it can cause bigger problems like wasting feed, chicks eating their bedding, and upset digestive systems. Get your chicks small plastic feeders to be placed on the floor of the brood. Ideally choose a red feeder, as red attracts the chicks. Fill your feeders with fresh food because when the chicks arrive home, they will definitely be hungry.
Get Chick Waterers

Like feeders, you will ideally want to choose a chick waterer that is better sized for the chicks. Chicks are more prone to illness and disease, so keep this water clean and keep the chicks out of the water. Refresh the water daily with fresh and clean water. Similar to the feeders, be sure the chick waterer is filled with fresh water when the chicks arrive home. They will have spent a lot of time traveling to get to you and will undoubtedly be just as thirsty as they are hungry.
Install the Chick Brooder

Chicks like their living space to be cozy, clean, and warm. Chicks need a draft-free brooder pen with red brooder lamps that stay on at all times. The lamp is crucial, as this is going to keep the chicks warm. Place a thermometer under the bedding to be sure the brood is around 92-95°F at all times. Warm temperatures create the optimal environment for raising chicks. Colder temperatures can contribute to illness, detrimental behavior, and even cannibalistic tendencies. Place the feeder and waterer on the edge of the area where the heat lamp covers the brood. Like with the feed and water, be sure the brood is nice and warm before moving the chicks in. Keep the brooder lined with at least 2 inches of brooder bedding to keep the chicks warm, cozy, and comfy.
Welcoming the Chicks

Upon receiving the chicks, it’s always a good idea to do a headcount to make sure everyone is there. Chicks have a relatively high mortality rate, so don’t be alarmed if a couple of chicks have not made it from the farm to your home. Suppliers will often add a few extras to make up for any potential losses. The same rule of thumb goes for your chicks once they are living in your brooder; some chicks may die before they reach adulthood, which is to be expected.
Once you’ve brought your chicks home, the fun begins! As you’re moving the chicks into the brooder, the first and most important thing to do is to dip each of their beaks in water. By dunking their heads in the water, you train them to know how to drink and where their water is. Next, place them by the feeder. Don’t worry about identifying them now, as their markings and appearance will change rapidly as they grow. You’ll need to do a few things to keep the chicks properly maintained.
Observe the Chicks

Once the chicks have settled into their new home, it’s time to sit back and watch them. This can be fun and entertaining, but can also offer a lot of educational value. Within the first few hours, chicks should have found their way to their food and water. If you see any confused, lone, or peeping chicks, it’s likely they’re cold or having difficulty finding water and feed. Give them a little push in the right direction so they are closer to the area under the heat lamp. Always keep an eye on the temperature. If the chicks are huddled together, it suggests they are too cold. If chicks are roaming outside the area of the lamp, then perhaps the lamp is too hot and should be adjusted.
Pasting Up Problems

Chicks have a tendency to dirty their bums. Consistently check the bums of each chick to be sure their fecal matter hasn’t clogged up their ability to defecate. It’s imperative to preventing disease and avoidable death in your chicks. Wipe their bums with a wet cloth or gently snip where feathers have become very caked in poop.
Keep Bedding Clean

Check the chicks’ bedding daily for wetness and buildup of fecal matter. Wet bedding and feces can chill the chicks and breed disease, so it’s important to keep the bedding clean. Scoop out wet or dirty bedding and replace it with dry and clean bedding.
Moving Chicks to the Coop

Moving your chicks to the chicken coop requires an adequate transition period. As they get older, gradually lower the temperature by 5° until the temperature reaches outdoor temperatures. Like getting seedlings ready to transplant outdoors, it’s important to harden off your chicks before moving them permanently to the coop. Starting at around 2-3 weeks old if temperatures outdoors are above 65°F, you can start bringing your chicks outside for short acclimating outings. By 4-5 weeks old, chicks are ready to move into the chicken coop full time.
To ensure the health and happiness of your little baby chicks, be sure you have all the tools and equipment you need while also knowing what to keep an eye out for.
Related Articles

How Does the Big Green Egg Work?
Wondering how the Big Green Egg works? Discover the full potential of outdoor cooking with this guide to the Big Green Egg from Do it Best.
Learn more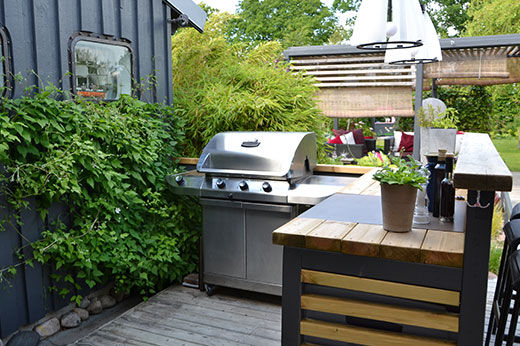
Elements of a Great Outdoor Kitchen
Seven items to add flair and excitement to your next backyard barbecue
Learn more

5 Reasons to Add a Backyard Griddle to Your Outdoor Kitchen
Find out why these flat-top wonders are the hottest trend in outdoor cooking!
Learn more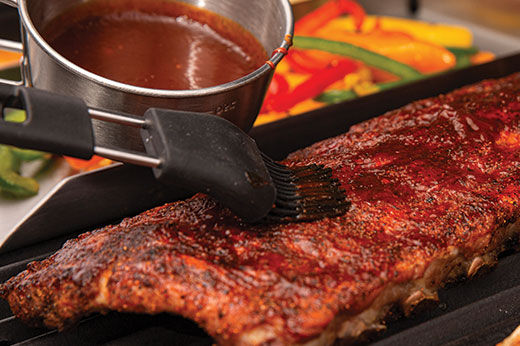
Grilling Accessories & How to Use Them
Check out these helpful tools to expand your grilling capabilities
Learn more